pulp3D is a 3D studio in your browser: build a scene from shapes, 3D files or objects made from a photo or a video, give it materials, animate it and turn it into images or videos. It is for designers, product makers, teachers and anyone who wants to do 3D without modelling everything by hand.
Getting started
The first time you open pulp3D, a sample model (the Atelier Armor premises with an animated tower crane, materials and late-afternoon light) opens by itself so you can see what it looks like; Start from scratch or Remove the example clears it in one click, and File › See the example again brings it back. It is not saved anywhere until you change it.
- On an empty scene, choose Photo → 3D object, Video → 3D scene or open the demo. You can also drop a 3D file, a photo or a video onto the window.
- Add items from the Create tab on the left: shapes (cube, sphere, cylinder, torus…), lights (sun, point, spot, area), camera, terrain, rigged mannequin.
- Pick a mode at the top of the view: Object to move whole objects, Parts to model vertices, edges and faces, Material to apply materials, Animate to set keys.
- Switch the view to Path tracing for a realistic render, then Render › Render an image… or Render a video….
- Save the scene with Ctrl+S (a lossless .p3d file); to exchange it with other software, use the Export menu.
Common tasks
How do I create a 3D object from a photo?
Choose AI › Photo → 3D object, then pick a photo where the object is clearly visible and stands out from the background. The Automatic method picks the best option for your device. Fast (depth and silhouette) is sharp from the front but estimates the back; Full reconstruction rebuilds the whole volume (about 460 MB to download once; it needs a recent graphics card and a compatible browser, recent Chrome or Edge), but the back is imagined and blurrier.

How do I give a material to an object or a part?
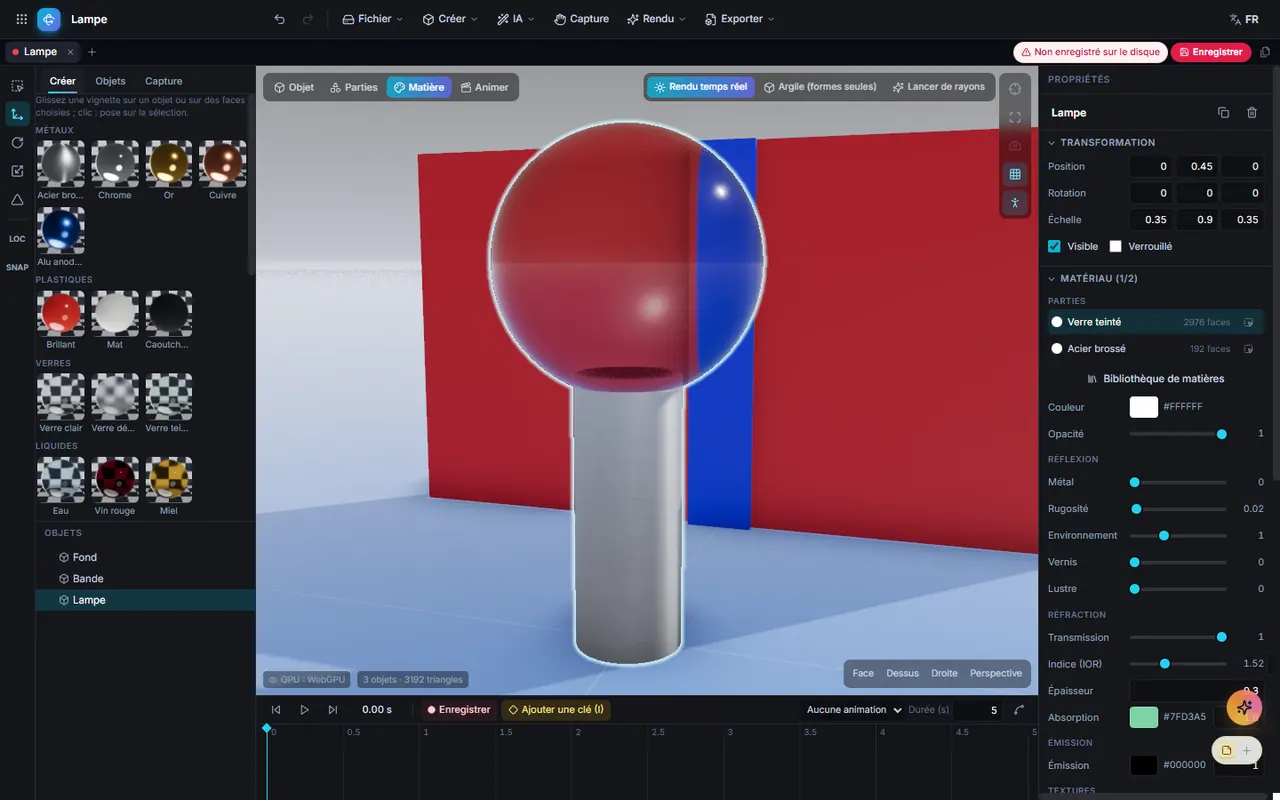
Switch to Material mode (M): the Material library appears (metals, plastics, glass, liquids, wood, stone, fabric, leather, ceramic, skin, emissive). Click a thumbnail to apply it to the selection, or drag it onto an object or a part (Shift: the whole object). Then adjust colour, metal, roughness, clearcoat, transmission, index of refraction and textures in Properties. Keep your own settings in “My materials”.
How do I model a shape?
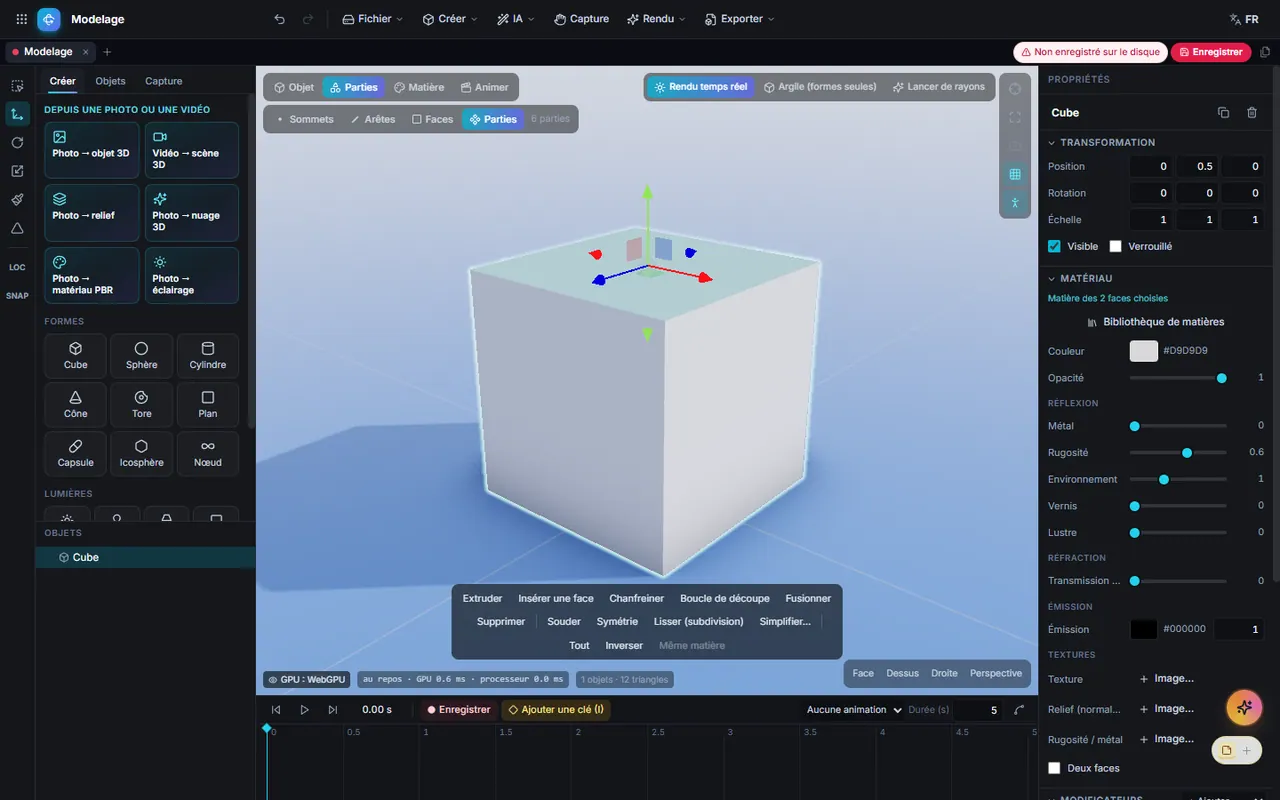
Select the object, press Tab to switch to Parts mode, then choose vertices, edges, faces or parts (1 to 4). The bottom bar offers Extrude, Inset face, Chamfer, Loop cut, Merge, Weld, Symmetry, Smooth (subdivision) and Simplify. Non-destructive modifiers (mirror, array, subdivision, smoothing, simplification, boolean) are added in Properties.
How do I sculpt?
In Parts mode, press S: the Inflate, Smooth, Flatten and Grab brushes appear with radius, strength and X symmetry. A mesh that is too light is densified automatically on the first stroke (Ctrl+Z to go back). Hold Ctrl to carve with Inflate.
How do I combine two objects?
In Object mode, select two objects: the Combine two objects bar offers Union, Subtract, Intersect and Join. Boolean operations need closed objects.
How do I animate a hinge or a character?
In Properties, under the joint settings, choose a joint type (Hinge, Wheel, Ball joint, Fixed or unconstrained), the axis and the limits; Auto-articulate detects lids, wheels and swinging parts. Set keys with I and play with Space. For a character, open the Capture tab: the webcam, a video or the recorded sample drives the rigged mannequin or an imported character with a skeleton.
How do I light the scene and pick a backdrop?
Add lights from the Create tab (sun, point, spot, area), then set the Environment in the scene properties: Sky (sun height and direction, or time of day: morning, noon, late afternoon, dusk), Photo studio, HDR image or Colour. The background can be the environment, blurred, a colour or transparent. The Render panel sets exposure, bloom, ambient occlusion, depth of field and light bounces; Render camera picks the camera that is used.
How do I add a 3D file to my scene, or see what is supported?
File › Import into scene… adds a file to the objects already there (you can also drop it onto the window). File › Supported formats… lists what can be read and written, with each format's limitations.
How do I repair a mesh?
Right-click the object › Clean up removes duplicate vertices, flat faces and holes. In the Mesh section of the properties you will find Automatic UVs, Simplify (50%), Remesh (smooth), Flip normals and Origin at base center.
How do I lighten a heavy model?
Right-click the object › Simplify…: choose a goal (web and augmented reality, 3D printing, animation) or a triangle count, with a before/after preview. pulp3D also suggests it on its own above 300,000 triangles. Export › Add levels of detail (LOD) writes a .glb with three levels.
How do I render an image or a video?
Render › Render an image…: Path tracing (realistic) or Real-time engine, size from HD to 4K, number of samples; the result is a PNG. Render a video… produces an MP4 at 24 to 60 frames per second over the timeline; it needs Chrome or Edge.
How do I send a mechanism to pulpRobot?
Once the parts are articulated, To pulpRobot (URDF) (in the animation properties of a joint) produces a file that pulpRobot imports, with the segments, joints, limits and shapes; Part for pulpRobot exports the object alone as a part.
How do I send a STEP assembly to pulpProduct?
Open the STEP file (the CAD reading module, about 7 MB, is downloaded once after you agree): the tree of products and occurrences is kept in the scene. A banner then offers Send the assembly to pulpProduct. Identical occurrences under the same parent (same name, same geometry) become a single line with their quantity, and a sub-assembly present in two places is counted once in its own bill of materials. See the pulpProduct help.
Supported formats
| Format | Open | Save | Notes |
|---|---|---|---|
| pulp3D scene (.p3d) | Yes | Yes | Native, lossless format |
| glTF (.glb, .gltf), VRM | Yes | glb, gltf | Skeletons, morphs, animations |
| Blender (.blend) | Yes, partial | No | See limitations |
| FBX | Yes | No | Animations are read |
| OBJ (+ .mtl) | Yes | Yes | Drop the .mtl together with the .obj |
| STL, 3MF | Yes | Yes | Millimetres, Z axis up |
| PLY | Yes | Yes | Mesh or point cloud |
| COLLADA (.dae) | Yes | Yes | Exported without skeletons or animation |
| USD (.usdz, .usda, .usdc) | Yes, partial | usdz | Exported without lights or cameras |
| DXF | Yes, partial | Yes | 3D faces and meshes |
| LightWave (.lwo, .lws), 3DS | Yes | No | |
| STEP, IGES, BREP, FreeCAD (.fcstd) | With the CAD module | No | About 7 MB module downloaded on demand |
| Point clouds (.splat, .spz, .ksplat) | Yes | .splat, .ply | |
| BVH | Yes | No | Skeleton and animation |
| SketchUp (.skp), Cinema 4D (.c4d), AutoCAD (.dwg) | No | No | Closed formats: see below |
| Images, videos | Yes | PNG, MP4 | A dropped photo or video starts 3D creation |
Known limitations:
- .blend: files from Blender 2.4 to 5, compressed or not. Kept: objects and hierarchy, meshes, UVs, vertex colours, shape keys, simple materials, lights, cameras and collection instances; Subdivision, Mirror, Array, Boolean, Decimate and Smooth modifiers stay editable. Not kept: armatures (objects come in at rest pose), animations, curves, text, metaballs, volumes. Other modifiers are not applied.
- SketchUp, Cinema 4D, AutoCAD (DWG): closed formats, not supported. pulp3D shows what to do instead: export to glTF, COLLADA, FBX or USDZ from SketchUp; to glTF or FBX from Cinema 4D; to DXF (DXFOUT command) or to STL and FBX from AutoCAD.
- DXF: lines without thickness are skipped; ACIS solids are reported and must be exported as meshes from the original software.
- An import report lists what was not kept and the units that were assumed (centimetres or millimetres depending on size): check the scale.
- FBX is not written; glTF export does not include the camera focus distance.
Keyboard shortcuts
On a Mac, Cmd replaces Ctrl. Keys do nothing while you are typing in a field.
| Shortcut | Action |
|---|---|
| Ctrl+Z / Ctrl+Shift+Z or Ctrl+Y | Undo / Redo |
| Ctrl+D | Duplicate |
| Ctrl+G / Ctrl+Shift+G | Group / Ungroup |
| Ctrl+A | Select all (Parts mode) |
| Del or Backspace | Delete the selected parts or objects |
| Tab | Switch between Object and Parts |
| M / A | Material mode / Animate mode |
| 1 2 3 4 | Vertices, Edges, Faces, Parts (Parts mode) |
| Q / W / R | Select / Move / Scale |
| E | Rotate (Object mode); Extrude (Parts mode) |
| T | Rotate (Parts mode) |
| B / K / S | Chamfer / Loop cut / Sculpt (Parts mode) |
| F | Frame the selection or the whole scene |
| I | Set a key (position, rotation, scale) |
| Space | Play / pause |
| Esc | Deselect all |
| Ctrl+S / Ctrl+Shift+S / Ctrl+O | Save / Save as / Open |
| F1 | Open this help |
With the mouse: drag with the left button to orbit the view, the right button to pan, and the wheel to zoom. Shift+Click or Ctrl+Click adds to the selection; double-click frames the object. In number fields, ↑ and ↓ change the value (Shift: ×10).
AI in pulp3D
The features in the AI menu run on your device. They need a recent graphics card and a compatible browser (recent Chrome or Edge). Each model is downloaded once, after you agree (about 100 MB for depth, 460 MB for full reconstruction), then kept on the device for offline use: manage them in AI › AI models… and see AI models.
- Photo → 3D object: a closed object from a single photo (see above). The back is always estimated or imagined; on a person, facial features may be distorted.
- Photo → relief: a layered relief that holds up to a rotation of about 30°; the Fill hidden areas option invents what is hidden behind the foreground.
- Photo → 3D cloud: a point cloud you can explore a little.
- Video → 3D scene: a few frames of the video are used to estimate depth and camera position, then to build a point cloud. It is a first approximation: the scale is arbitrary, and a finer result needs a powerful compute machine connected by your administrator.
- Photo → PBR material and Photo → lighting: computed without an AI model; they derive a seamless material or ambient lighting from a photo.
- Capture and Auto skeleton: 33 body points and facial expressions tracked from the webcam or a video, then transferred to a character. The auto skeleton expects a standing human figure facing the camera.
Depending on your installation, an optional conversion and compute service can be connected by your administrator: it converts files with software already installed (FreeCAD, Blender, a DWG converter) and takes on heavier jobs (refined reconstruction or point clouds). In that case the photo, video or file is sent to it. Without that service, nothing leaves your device. pulp3D does not create objects from text.
FAQ and troubleshooting
My .skp, .c4d or .dwg file won't open.
These are closed formats and are not read. pulp3D shows how to export them to glTF, FBX, COLLADA or DXF from the original software. If that software is installed and the optional conversion service is connected, the Convert with the relay button does the export for you.
My .blend file opens without its animation.
Animations and armatures in Blender files are not read. Export the scene to glTF (.glb) from Blender: skeletons and animations then come through.
Rendering is slow or path tracing looks simplified.
Without a recent graphics card, or with a browser that is too old, pulp3D switches to a slower mode with simplified path tracing. Use a recent version of Chrome or Edge. The first realistic render can take a minute or two to prepare. Point clouds are not shown in path tracing.
The imported object is tiny or huge.
pulp3D assumes centimetres or millimetres depending on the file's size; read the import report and correct the Scale in Properties.
Where is my scene saved?
A rescue draft is kept on this device while you work; to keep the scene, save a .p3d file. Materials in “My materials” stay on this device. See your documents.
The webcam isn't offered for capture.
Allow camera access in your browser. Without a camera, use a video or the recorded sample.